Find out how to get your pages published on the Internet so others can enjoy them too.
Lesson 13: Uploading pages
Until now, only you have had the satisfaction of viewing your pages. Now it is time for the rest of the world to see your masterpieces.
Is the world ready for that?
The world is ready - you soon will be too. To get your website on the internet, you just need some server space and a free FTP program.
If you have Internet access, you might already have some free server space for your website. Your server space will then probably be called something like http://home.provider.com/~usernumber. But you might need to activate it first. Read more about this in the papers from your Internet provider or on their support pages.
Another option is to get some free server space on the Internet. In the same way that you set up an e-mail account (at for example Hotmail), you can register for free server space on the Internet. Several companies offer such a service - among them Angelfire(click "Sign Up" and choose the free membership) - it will only take a couple of minutes to register.
To have access to the server, you need to know the "Host Name" (For example, ftp.angelfire.com) and have your username and password ready.
Is that all I need?
To access the server and upload your pages, you also need an FTP program. FTP is short for File Transfer Protocol. A FTP program is used to connect two computers over the Internet so that you can transfer files from your computer to another computer (the server). You might not have such a program yet, but fortunately, this can be downloaded for free.
There are many different FTP programs. One of the better is FileZilla, which is entirely free. So now you can download FileZilla at filezilla.sourceforge.net.
And how do I upload the pages?
Described below is how you upload your pages to a free account at Angelfire with FileZilla. But the procedure is, more or less, the same for all providers and FTP programs.
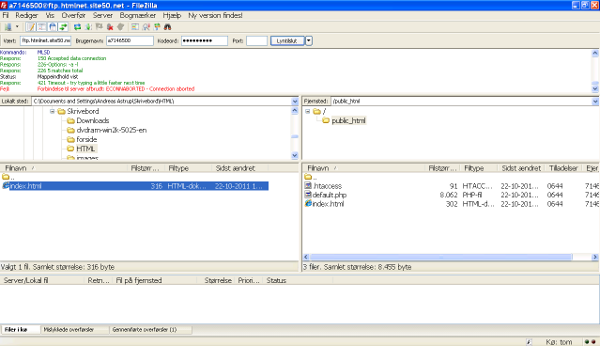
Open the FTP program while connected to the Internet. Insert "Host Name" ("ftp.angelfire.com" under "Address"), username (under "User") and password (under "Password") and click "Connect". You should now have access to the server. In one side of the program you can see the contents of your computer ("Local Site"), and in the other side, you can see the content of the server ("Remote Site"):
 Find your HTML documents and images on your computer (on the "Local site") and transfer them to the server (the "Remote site") by double clicking on them. Now the whole world can see them! (For example, at the address http://www.angelfire.com/folk/htmlnet/page1.htm).
Name one of the pages "index.htm" (or "index.html") and it will automatically become the start page. i.e. if you type http://www.angelfire.com/folk/htmlnet (without any filename) you will actually open http://www.angelfire.com/folk/htmlnet/index.htm.
In the long run, it might be a good idea to purchase your own domain (for example www.your-name.com or www.your-name.net) and avoid the long and complicated addresses you are being assigned by your Internet provider or from providers of free server space. You can find and purchase domains at for example Speednames orNetworkSolutions.
Comments
Post a Comment