A few pieces of good advice for your website projects.
Lesson 15: The final tips
Congratulations, you have now reached the final lesson.
So now I know everything?
You have learned a lot and you are now capable of making your own websites! However, what you have learned are the basics and there is still a lot more to be mastered. But you now have a good foundation from which to build on.
In this last lesson, you will get some final tips
:- First, it is a good idea to maintain order and structure in your HTML documents. By posting well arranged documents you will not only show others your mastery of HTML but will also make it considerably easier for yourself to keep an overview.
- Stick to the standards and validate your pages. This cannot be stressed enough: Always write clean XHTML, use a DTD and validate your pages onvalidator.w3c.org.
- Give your page contents. Remember that HTML is a tool, which enables you to present information on the Internet, so make sure that there is information to present. Pretty pages may look nice but most people use the Internet to find information.
- Avoid overloading your pages with heavy images and other fancy stuff you have found on the Internet. It slows down the loading of the page and could be confusing for visitors. Pages that take more than 20 seconds to load can lose up to 50% of their visitors.
- Remember to add your website to search engines/directories so people other than your closest family can find and enjoy it. On the front page of all search engines, you will find a link to add new pages (The most important is Google, but there are also others like DMOZ, Yahoo, AltaVista, AlltheWeb and Lycos).
- In this tutorial, you have learned to use Notepad, which is a simple and very easy to use editor, but perhaps you will find it helpful to use a more advanced editor which gives a better overview and more possibilities. You can find a summary and reviews of different editors on Download.com.
How do I learn more?
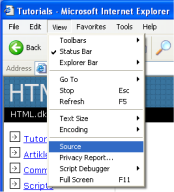
First of all, it is important that you continue to work and experiment with the things you have learned in this tutorial. Study other people's websites and if you find something you like see how it was made with "View Source" (Click "View" in the menu in your browser and choose "Source").
Search the Internet for examples and articles on HTML. There are lots of websites with great contents on HTML.
Read and ask questions in the Forums. This is where you meet the real experts from whom you can learn a lot.
Last, but not least, you should - whenever you feel ready - continue learning CSS in ourCSS Tutorial.
The only thing left is to wish you hours of fun with your new friend, HTML.
See you on the Internet :-)
Comments
Post a Comment